
Tesla Model Y Roof Rack Installation Guide (Step by Step)

OCTOBER 12TH, 2020
AUTHOR: KEVIN STILLERMAN
Tesla and the Outdoors
So, you own a Tesla Model Y and you are looking for the best way to transport your kayak, bicycles, or other outdoor gear? The Tesla Model Y Roof Rack is currently available for sale on the Tesla Shop for $450 and is custom designed to perfectly fit your “MY”.
For those of you that are considering paying someone else to install the roof rack for you, I would highly encourage you to look at this step by step installation guide and then re-evaluate.
If you are one of those people who prefer to digest content in video format check out our YouTube video installation guide linked below.
The installation process is overall really simple, and can be done in 15 minutes or so, so save a few bucks and put it towards a few extra miles of charging.
What's in the Box?
Alright, so let’s start by seeing what comes in the box when you buy the Tesla Model Y Roof Rack.
As expected, you will find an owner’s manual with basic installation steps, but hopefully this step by step guide will serve as a better option.

#1 Clip Tool
#2 Hex Wrench
#3 Tape Measure
#4 Rear Crossbar
#5 Front Crossbar
#6 Front Driver Side Pad
#7 Front Passenger Side Pad
#8 Rear Driver Side Pad
#9 Rear Passenger Side Pad
#10 Keys
#11 Wingnuts
#12 Clips
#13 Anti Abrasion Tape (Front Driver Side)
#14 Anti Abrasion Tape (Front Passenger Side)
#15 Anti Abrasion Tape (Rear Driver Side)
#16 Anti Abrasion Tape (Rear Passenger Side)
#17 Cover (Rear Crossbar)
#18 Cover (Front Crossbar)
In addition to the main front and rear crossbars, you will also find mounting clips, flexible pads, anti-abrasion tape, wingnuts, and aesthetic covers.
You will also find a set of keys to securely lock the rack to your vehicle to prevent theft.
The kit also comes with a plastic clip tool, a tape measure, and a hex wrench.
All of the parts came packaged really well, and the build quality and design of the cross bars is excellent.
So now that we have everything out of the box I’m going to walk you through the installation process step by step.
Step 1
The first step is to wipe down your car in preparation for the install. I would definitely recommend using a microfiber car towel for this step so that you don’t scratch or damage the paint.


Owner’s Manual: “Thoroughly clean vehicle’s rooftop around the location of the arrows on the glass.”
Step 2
Next, use the icons on the rubber footpads and anti-abrasion tape to identify the correct install locations on your car.

The footpads and tape have car icons with an arrow pointing towards the front of the car and the tire on the diagram is filled to show you which corner of the car they mount.


Owner’s Manual: “Use the icon on the footpads (6-9) to help identify the appropriate position on the vehicle and match anti-abrasion tape (13-16) to footpad (6-9).”
Step 3
For the next steps I recommend marking the included tape measure with a sharpie at 227mm and 412mm.

The front crossbar is mounted 227mm front the front edge of the glass top roof, so align the tape measure with the front of the glass and the 227mm mark you just added should land in the perfect spot.

Owner’s Manual: “To locate the front arrows measure 227 mm from the front edge of the glass top.”


Tesla is really clever here and has marked this location with an arrow that is only visible if you shine a strong light up to it, and this is highly recommended to make sure you are in the right spot.
Step 4
Then, use the 412mm mark on the tape measure to locate the rear crossbar mounting location by measuring from the back end of the glass roof.


Owner’s Manual: “To locate the rear arrows measure 412 mm from the rear edge of the glass top.”
Step 5
Now that you have located the mounting positions, in Step 5 peel the backer off of the appropriate anti-abrasion tape pieces and apply it to the car, making sure to align the arrow on the tape with the arrow on the car.

Make sure the tape is laying flat and try to remove any bubbles and then repeat this for all 4 corners of the car.

Owner’s Manual: “Apply (13) anti-abrasion tape to the front driver side of the vehicle by aligning the arrow on the glass with the arrow on the anti-abrasion tape (13), and aligning the edge of the tape with the edge of the trim line. Repeat for the other three corners of the car.”
Step 6, 7, 8
In Steps 6, 7, and 8 use the plastic clip tool provided by Tesla to carefully pullback the rubber gasket and insert a metal clip at the arrow location by pushing the flat end into position and then rolling the clip 90 degrees towards you while removing the plastic clip tool.

In my opinion this is the most difficult step of the installation, so if you are still with me you are in good shape.
Owner’s Manual: “Use the clip tool (1) to carefully retract the 6 rubber gasket at the arrow location.”
Do not pull too hard or twist the clip tool to prevent accidently tearing the gasket.

Owner’s Manual: “Keeping the clip tool in place, insert a clip (12) at the arrow location.”


Owner’s Manual: “Remove the clip tool (1), being sure the clip (12) is engaged in the metal receiver under the glass. Pull up and wiggle to be sure it’s properly engaged. Be sure the center of hook aligns with the arrow. Repeat steps 4 to 6 to install a clip (12) on the other three corners of the car.”


Step 9
In Step 9 you simply slide the pads onto the metal clips in their respective locations at all 4 corners.


Owner’s Manual: “Place the front driver side pad (6) over the clip on the front driver side. Use the icon to help identify and install the correct pad (6-9) in the proper location. Repeat to install the remaining pads (7-9) at the other three corners of the car.”
Step 10
It’s helpful to have a second set of hands for Step 10 as you place the front and rear crossbars into place over the metal clips.


Owner’s Manual: “CROSSBAR INSTALLATION: Ensure all four hooks are engaged, properly aligned (step 5-6), and in the upright position. Then, carefully place the front and rear crossbars (4-5) over the pads.”
Step 11
Next install the wingnuts and hand tighten them on each of the towers.


Owner’s Manual: “Install the wingnut (11) and hand tighten onto each of the towers.”
Step 12
In Step 12 use the provided hex wrench to further tighten the wingnuts. Tesla recommends tightening these to 2.5-3.5 Nm of torque, but if you are like me and don’t have a torque wrench you can just tighten to hand-tight plus a half turn or so.

It is important to note here that you definitely do not want to overtighten during this step because it may result in vehicle damage, so no need to use your hulk arms for this step.

Owner’s Manual: “Tighten the wingnuts with the hex wrench (2) vehicle. We recommend tightening to 2.5-3.5 Nm installed, pull in all directions and ensure there’s no movement. In order to lock the system, the mark on the wingnut must align with the mark on the tower (see fig.1). *Overtightening may result in vehicle
damage.”
Step 13
Next use the provided key to lock each of the crossbars in place.


Owner’s Manual: “Use the key (10) to lock each tower.”
Step 14
You can test to make sure that they are secure by pulling on them in all directions to ensure they don’t move around.


Owner’s Manual: “Test that the front and rear crossbars are securely installed by pulling vigorously in all directions.”
Step 15
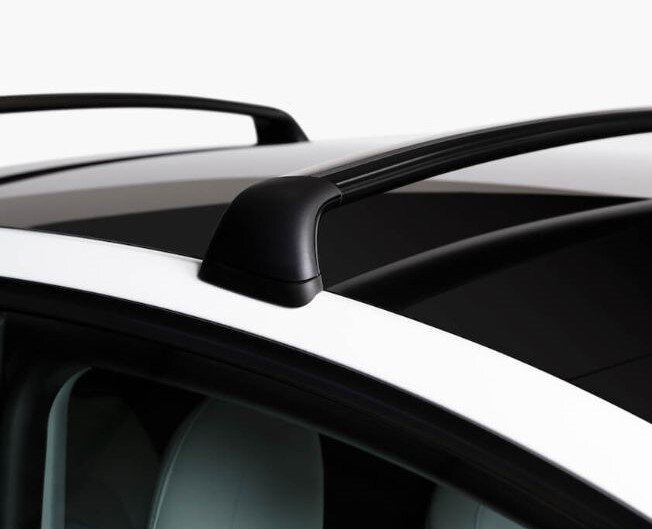
And now you have made it to the final step which is simply to install the plastic covers on each of the 4 corners by pressing them into place.


Owner’s Manual: “Install covers. Start with the bottom edge then press the top into place.”

Summary
And just like that your Tesla Model Y Roof Rack is installed and ready for action!

Hopefully this step by step guide was helpful to you!
If you have any questions or comments, make sure to leave those in the discussion section below and I am curious to know: What you plan on using your Tesla Model Y Roof rack for?
Leave a comment below and join the conversation!


